Thursday, 10 November 2011
Facilitating of Coursework
Tuesday, 8 November 2011
Product line!
 Proudly presenting.......my product line! It was created by Angeline and I.
Theme: Nature.......and everything recycled! :)
Product:
- Bangle, A pair of earrings, Ring (recycled old wanted earring, bangle and ring, napkin and paint)
- Jewellery Box (Old watch box, mounting board to create the compartments, paper, craft glue, paint and napkin)
- Necklace (Old cloth, material from an old dress, pendent from a spoil necklace)
- Hairband (Old felt from previous project, Embroidery thread, fabric glue, elastic band and lace)

Reflection on my Marco-teaching
As strange as this may sound, I actually thoroughly enjoyed this experience. Although there were definitely moments of stress and distress, I would proudly say that we group managed to make it through and (at least to me) our dishes were more or less pretty good! I would especially give credit to Shi ping who did Roti Jala for the first time and managed to master it after many tried. I also, practiced my ‘Ang Ku Kueh’ dish 8 times! The first 3 times was a total flop! The skin was too thick, the dough was too dry, everything was just wrong. So I asked for advice from my aunt, who gave me the recipe to follow, and through her guidance, the following tries became better and better. I learnt a very important lesson through this, that it is not always about the recipe but also the skills and technique you use. Using my Ang Ku Kueh as an example, the problem I had was that I had mixed the sweet potato to the flour instead of the flour to the sweet potato. This caused lumping and also caused the dough to be very dry. From this, I learnt that cold ingredients should always be added to the hot ingredients and not hot ingredients to cold. I also mastered the shaping and ‘knocking’ out the kueh from the mould after countless practice and tries. There was always a sense of satisfaction after trying the new batch of kuehs and tasting the improvement.
Other skills on conducting the practical class were also learnt. Such as being well-prepared with the different steps ready so time will not be wasted in showing the students how to do it but just showing them how the end-product should look like. Also, to correct mistakes which students may make, instead of the teacher demonstrating, the teacher can ask the student to do it instead to correct them. This way, students will participate and make the demonstration time more interactive and fun. Finally, because these are still students, demonstrations done should not last more than five minutes as any time longer than that, students will tend to become restless.
Also, another important lesson learnt was how to do a proper table setting as I have not done or learnt how to do it before. It is important to have a focus point to prevent the table setting from looking too messy, cluttered or empty. A variation of colors is also crucial as it would give it a lively and more appealing appearance. However, colors should not clash or too blending but a good mixture of colors that complement each other and bring each color out. Giving the dishes different height by stacking or raising the food gives the table setting a ‘movement’ and gives it life also instead of placing it all horizontally down making it look dull and lifeless.
I think the most enjoyable part of this marco-teaching was the whole learning process. Learning a new dish and mastering it, learning how to plate and do a table setting and experiencing how to teach a practical class. Knowing I have brought back so much skills and knowledge with me after this just gives me the sense of achievement.

Monday, 7 November 2011
Practical for messy and unorganized people. (Like me!)
Why buy new items when you can recycle?!
'Make', not buy, don't waste money. Money is precious! (Remember, money management in one of the Home Economics topics? =P)
Anyway, if you think making an organizer from cheap materials such as newspaper is ugly, view the video above! Not that we'll come up with something as professional as them, but hey, we'll definitely be able to make something that fits our personality. =)
Sunday, 6 November 2011
Micro Teaching Group 6 - Kids Birthday Party (*Pink)

Product Line ...Kitchen Theme

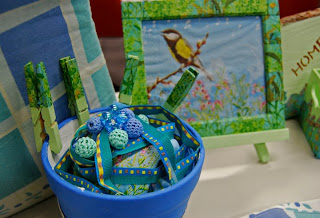
Finally we were done with your product line last week in Thursday which was based on the kitchen theme. Our products included a grocery bag, photo frame, flower pot, spice box, vendor's apron, small basket for cutlery or napkin holder and a wooden deco display which said 'Home Sweet Home'. There were many challenges that we faced when doing our product line but we had fun doing it as well. I have learnt how to carry out the napkin technique on wood. It was not easy as it required patience. We had to brainstorm and do quite some research to come up with ideas. Jieyi used her old bedsheet for this product line. Thanks Jieyi. Due to a busy time schedule and constrain we did our best to finish on time.
Also as the three of us were not a pro at sewing we used napkin technique skills and painting for our product line. As you can see from the photos we have matched the colours with the colour of the bedsheet being blue and green to give an overall effect matching the entire product line. I also got fantastic ideas from other groups as well. Some of the products done by other groups included - denim bags (chic and retro), baby products, army stuff, items for kids and girl's. Thank you Dr. Mok for all your guidance and inspiration for doing the product line. I enjoyed doing this activity as a group.
Post lesson activity
Textile product line!
Our live model of the day as just nice his clothing colours really suit our theme that day.

Saturday, 5 November 2011

Thursday, 3 November 2011
Last Microteaching Session
My favourite? Definitely the orange agar-agar. Because I am neither a chocolate-lover nor a vegetarian-lover nor do I love cakes. But the teachers were good and me and my partner for the day, Iva, manage to whipped up all the dishes within the time stipulated. Yay!
Above is a picture we took, just before packing up. (Apologies, the sushi and tempura were already in the plastic container when the pictures were taken)
Product Line Submission, 3rd Nov 2011 =)
Here's a picture of me and Atiqah's product line. HEHE.
Tuesday, 1 November 2011
Scrapbooking
End-product

Idea for deco?

I was helping my mum prepare vegetables and this came out by accident. Hmm....any idea if you feel this is a visible food decoration? It was very simple to do. Just cut the end of the vegetable stalk (the vegetable used here was xiao bai cai). You have to cut it just at the right. Not to near the end and not to far into the stalk. You can share your views on this! :)
Door Sign (Napkin painting) and Towel (Embroidery sewing)

Here's another really cool thing we did during textile class again! An embodied towel with my big fat name! :) Just the way i like it. :) Thanks Dr Mok for teaching us! :)
Because this is a towel material, we have to place a plastic cover the area we embroil to prevent the stitches from being covered by the towel material. :) The plastic will then be torn off when the embroidery work is finished! Also, another lesson learnt was how to 'fix' the situation if the needle breaks half-way through! Which happened to me twice. :( But all is well, as you can see from the bottom. :)


